
How does Risk Management work in Impero? 
- You want to gain a clear picture of the risk structure within your organization through a comprehensive risk registration? Set up a risk directory!
- You want to register the same risks for entities/departments to save time and effort? Create an entity!
- Now you have all your risks registered, you want to assess risks and see the your fitted risk matrix. Go to risk map!
➤ You need the role "Risk Manager" or "Administrator" to create new risk directories. Read more here.
Set up a risk directory
What is a risk directory?
A risk directory is a comprehensive register of risks for a certain process area in an organization, an entire organization or several organizations. It enables both a top-down and a bottom-up risk approach.
Here, you can register risks with name, description and individual risk attributes in a tailored pattern, and standardize it throughout your organization.
★ A more structured, complete and accurate risk registration helps you to further reduce unexpected risk exposure.
Quickstart: Create your first risk directory and set access rights
Caution: Check the choice of language in your personal profile while you create the risk directory. The directory will remain in the same language, even when changing the language settings afterwards. Make sure that you have selected the right language for your end-users.
- Go to Risk Management in the navigation menu.
- Click on "Create new directory". Give your risk directory a unique name and add descriptions.
- Under "Access Management", manage which users can view, edit or administrate this risk directory.
Risk directory access rights:
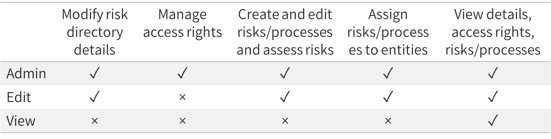
Note: Access rights can be complex. Don't hesitate to ask for help from your Customer Success Manager or via support@impero.com.
Tip on assigning access rights for risk directories:
Assign edit rights to persons who need to actively work in the risk directory, such as adding or assessing risks, e.g. a risk manager.
Assign view rights to persons who only need to review the risk population and assessment results, e.g. an external auditor.
Create your first risk
In a risk directory, click on "Add" and "New risk" below the name of the risk directory:

Enter a name for your risk, e.g. "Data not treated confidentially", and a more detailed description in the pop-up window on the right.
Select the corresponding risk details, such as the financial statement assertions and objectives in the default setting.
When do I need a process?
Note: Using processes is optional and NOT a must.
Use a risk process to structure your risks:
- Risk processes help you to categorize your risks into different areas such as financial reporting risks, tax risks and IT risks in a risk directory.
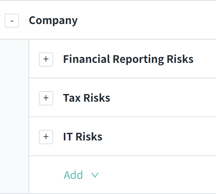
- Refine the structure of your risk directory with sub-processes. For example, within financial reporting risks, use sub-processes to separate different types of risks.
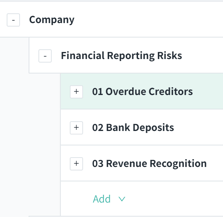
You can continue refining the structure by creating further subordinate layers. For example, create an additional layer below "01 Overdue Creditors" consisting of the 2nd level sub-processes 01.01, 01.02 etc. - Once you have created the structure of your risk directory, you can populate the risks below the corresponding process or sub-process.

When do I need an entity?
With setting up an entity in Impero, you can document clearly which risks a specific entity is exposed to. You need to assign risks to an entity in order to assess the risks.
Or your organization has several subsidiaries, business units or regions, and these organizational units are exposed to the same risk(s).
Create an entity for each of the organizational units:
- Go to Risk Management in the menu. Switch to the Entities tab
 on top.
 - Click on "Create entity". Give the entity a unique name and add descriptions.
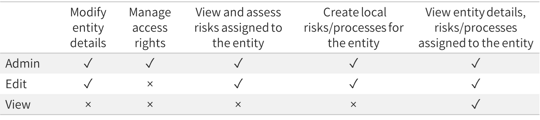
- Assign the needed access rights.
Then, you just need to create a specific risk once and apply it on several entities. Later, you can assess this risk separately for each entity.
Tip: You are done with setting up your risk directory? Reach out to your Customer Success Manager or via support@impero.com for a double check!
Assign risk to an entity
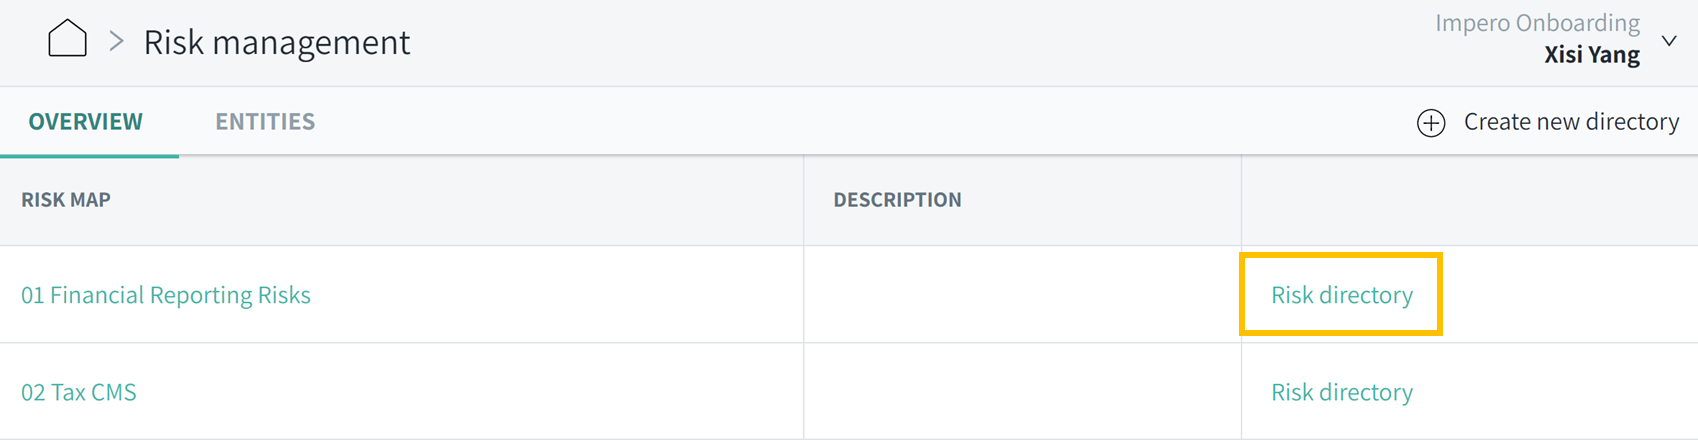
- Open a risk directory by clicking on "Risk directory" as in the orange box below.
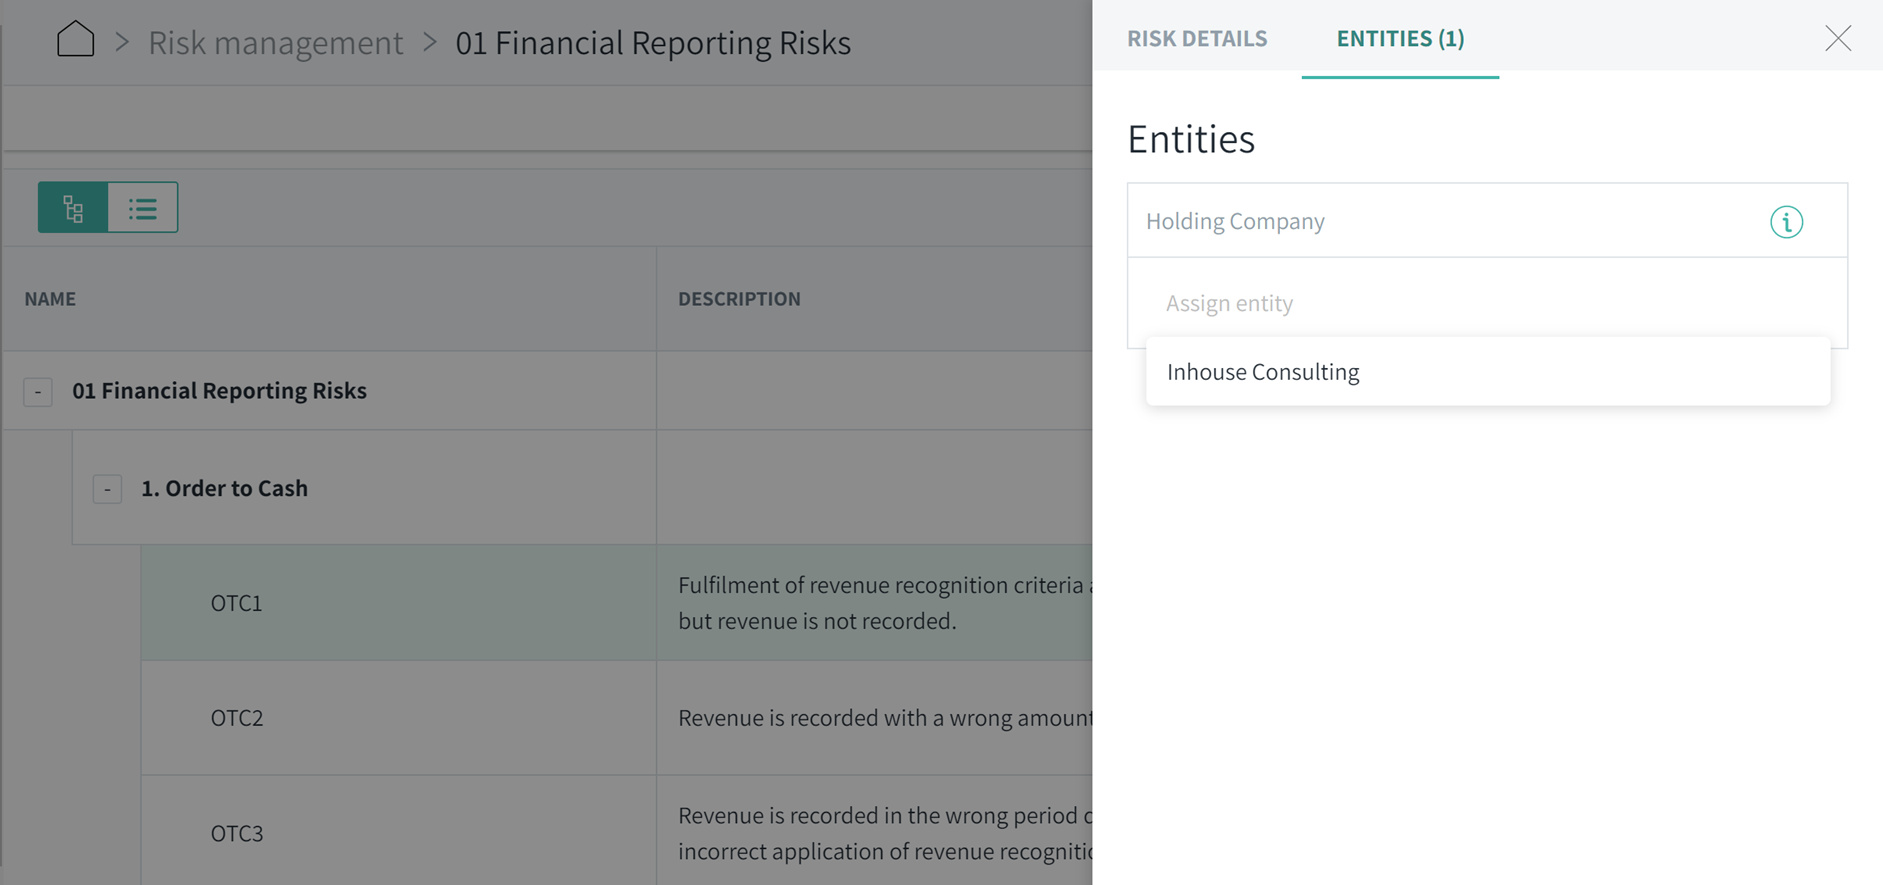
- Click on a process or a risk, such as "OTC1" below, and switch to the entity tab in the pop-up window. Click on "Assign entity" and choose the respective entity.
Preparation Guide: What needs to be decided in advance
Cautious: Before creating risk directories, we recommend you to have a clear picture on WHO in your organization should have access and work with WHICH risk directory.
Structuring approach
Think about the optimal level of consolidation or centralization for your organization:
- In the dimension of process area: e.g., finance, tax, IT etc.
- In the dimension of entity: e.g., subsidiaries, BU etc.
Need some practical examples and our recommendations for choosing the right level of consolidation?
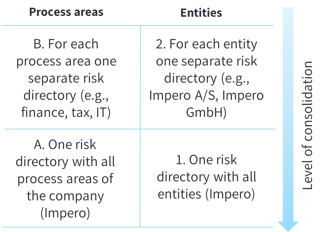
Find the corresponding scenario below, which shows the resulting risk directories:
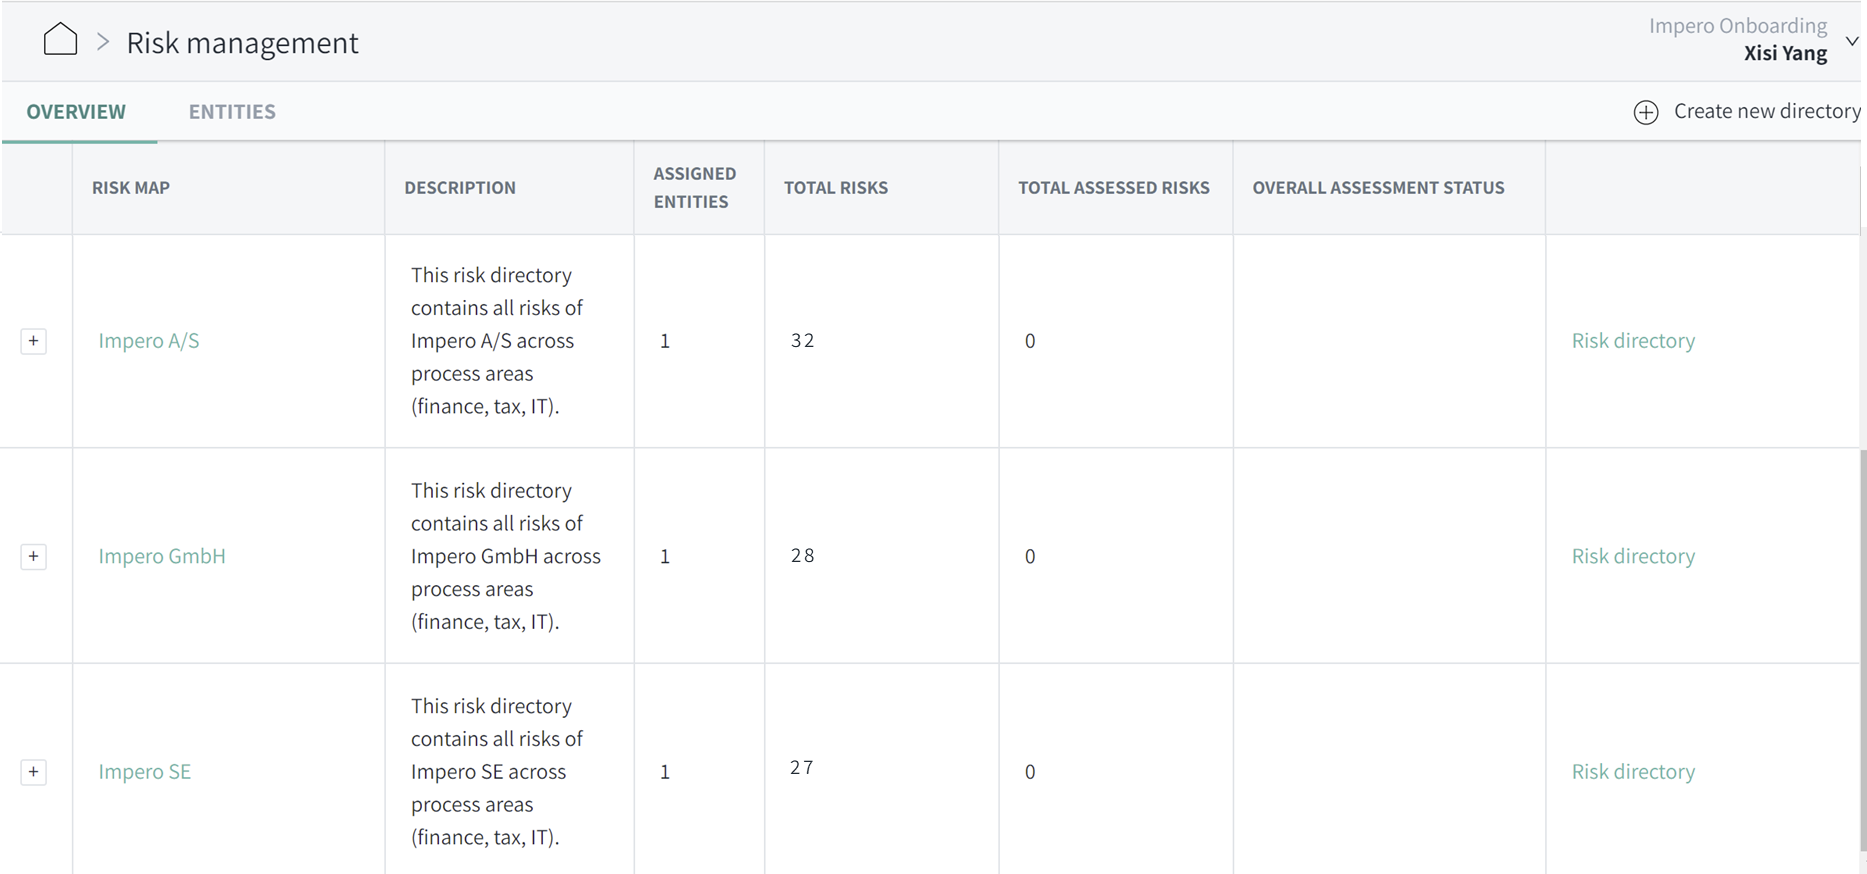
Scenario A1: You only have one risk directory that contains all risks from different process areas (finance, tax, IT) and entities.
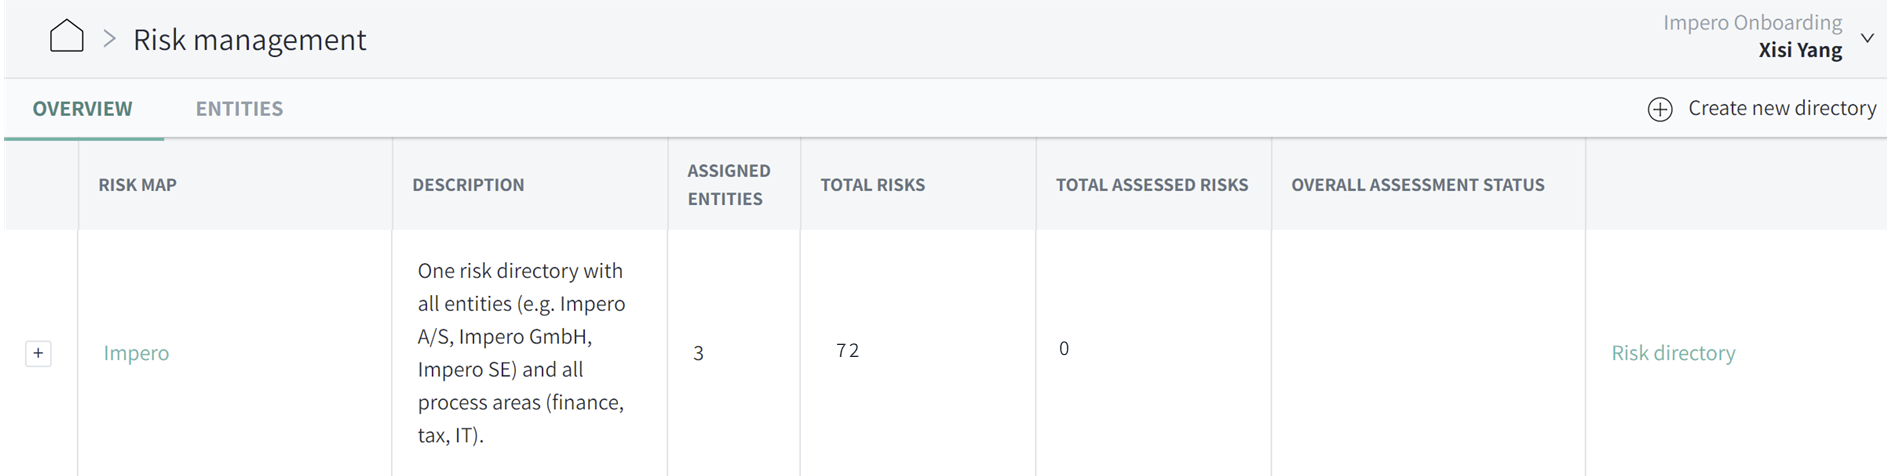
Suitable for smaller enterprises with low process complexity and one/few organizational units.
Scenario A2: You have a risk directory for each entity, which contains all risks from different process areas.
- Suitable for divisional structure
- Cautious with consolidation needs across entities for specific processes
Scenario B1: You have a risk directory for each process area, which contains all risks from different entities.
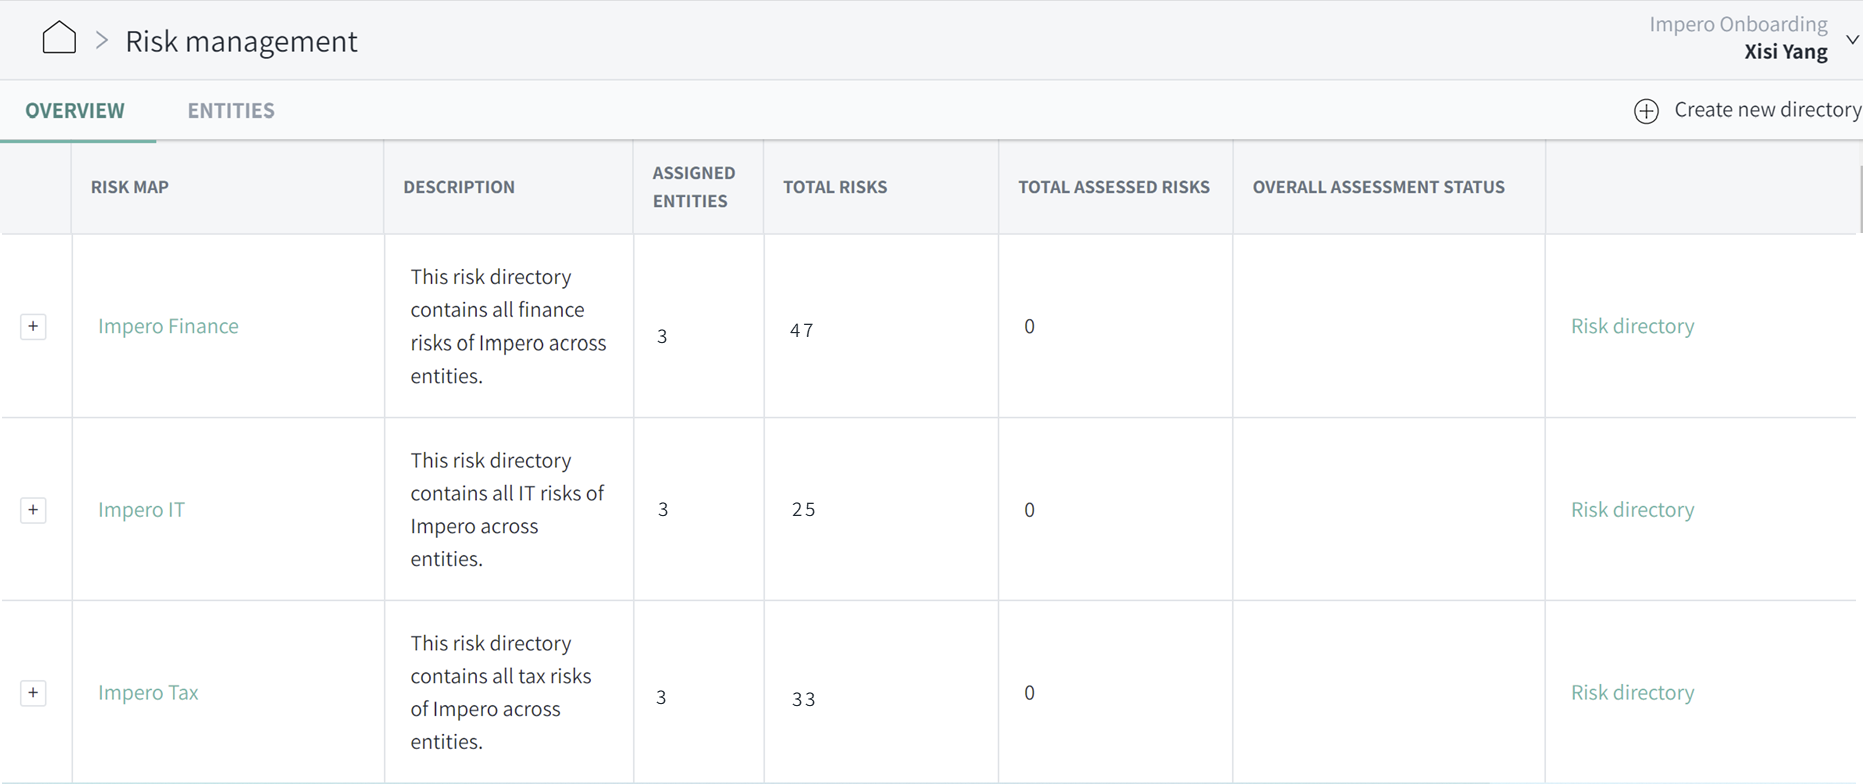
- Suitable for functional structure
- Cautious with different reporting and legal requirements between entities
Scenario B2: You have a risk directory per entity and process area.
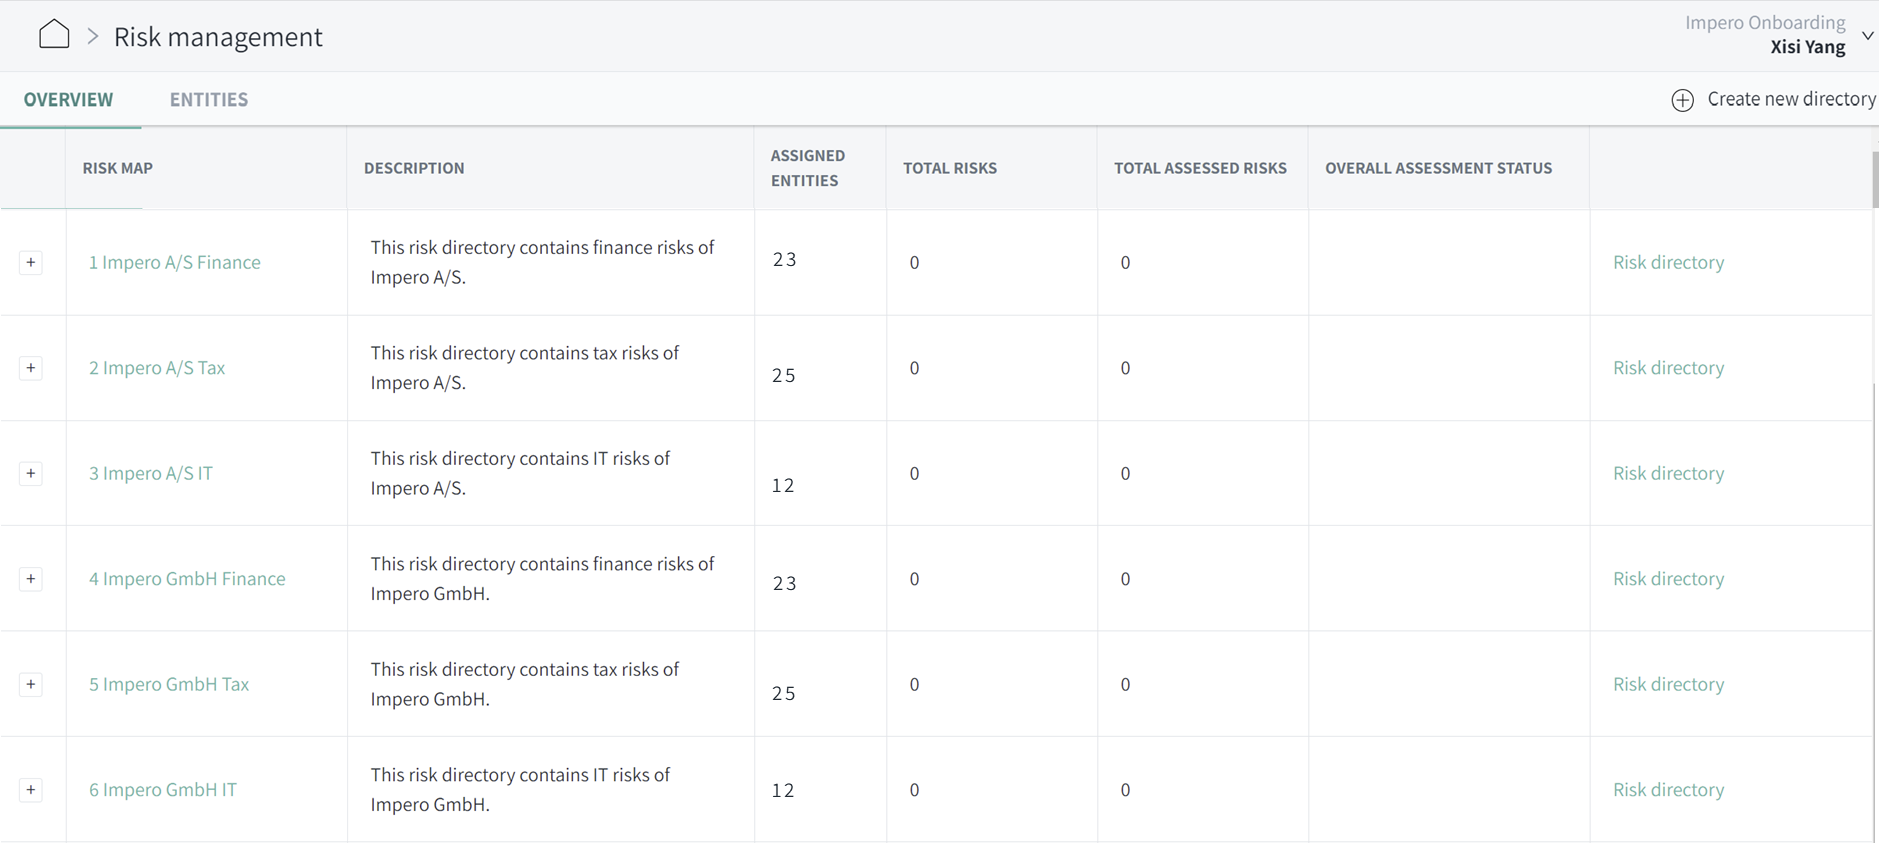
- Mostly only considered for larger enterprises with high process complexity and many organizational units in different legal environments
- Due to high administration efforts, larger enterprises are recommended to consider A2 and B1 first
Tip: Once you have a brief idea about your structuring approach, reach out to your Customer Success Manager to define the setting and access rights.
Customization of risk directory
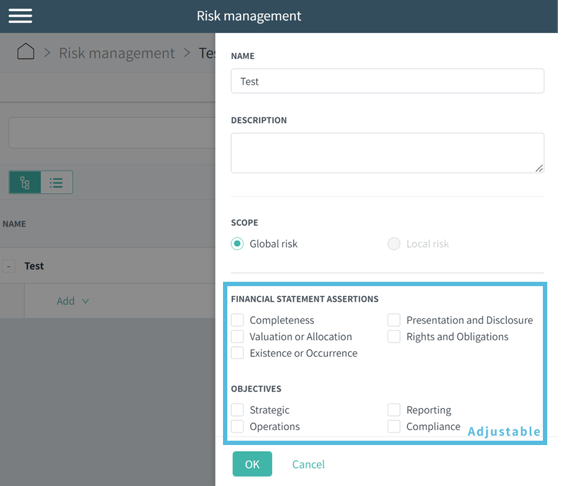
Fit the risk directory with your company-specific approach of risk registration.
Apply your individual risk attributes in the blue marked area. Both risk attribute dimension (e.g., objectives) and risk attributes (e.g., strategic, reporting etc.) can be replaced, extended or deleted.
Use these design elements to customize your risk directory:
| Radio-Button (Single Choice) |  |
| Checklist (Multiple Choice) |  |
| Comment field |  |
| Dropdown list | 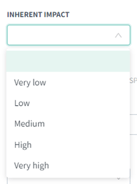 |
You have a lot of flexibility here: The number of risk attribute dimensions and risk attributes are not limited.
Note: Contact your Customer Success Manager to customize your risk directory.
Learn more:
Which role do I need to create a risk directory?
What is the difference between global and local risk?
Set up a risk map
What is a risk map?
A risk map gives you an overall picture of assessed risks in your organization. It delivers the total number of risks for each level of risk impact and likelihood in a graphical matrix.
The risk map section serves to assess risks based on your individual set of assessment criteria, and to document the mitigating controls and the residual risk impact and likelihood.
★ A thorough risk assessment with pre-defined standards helps you to gather a more accurate overview of the risk exposure across different functions, and to better support decisions.
Quickstart: Fit your first risk map
- Go to Risk Management in the navigation menu.
- Open a risk map by clicking on the name of the risk directory, e.g. "Financial Reporting Risks".
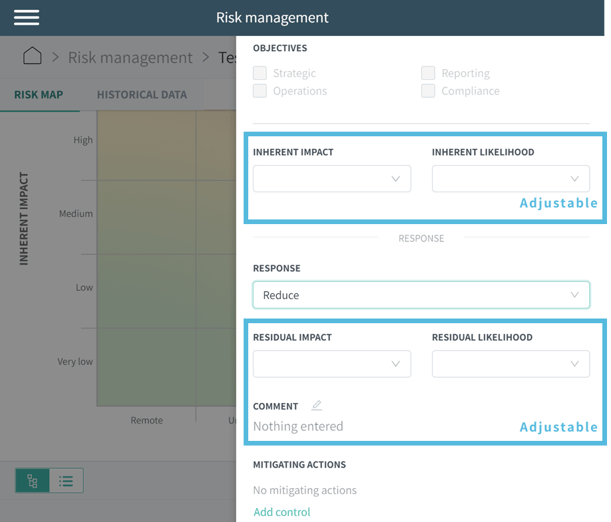
- Click on a risk such as "OTC 1". In the pop-up window, assess the level of inherent impact and likelihood using the dropdown list.
- Select one response activity to this risk among the options "Not applicable", "Transfer", "Avoid", "Reduce" and "Accept".
- If "Reduce" is selected, assess the level of residual impact and residual likelihood.
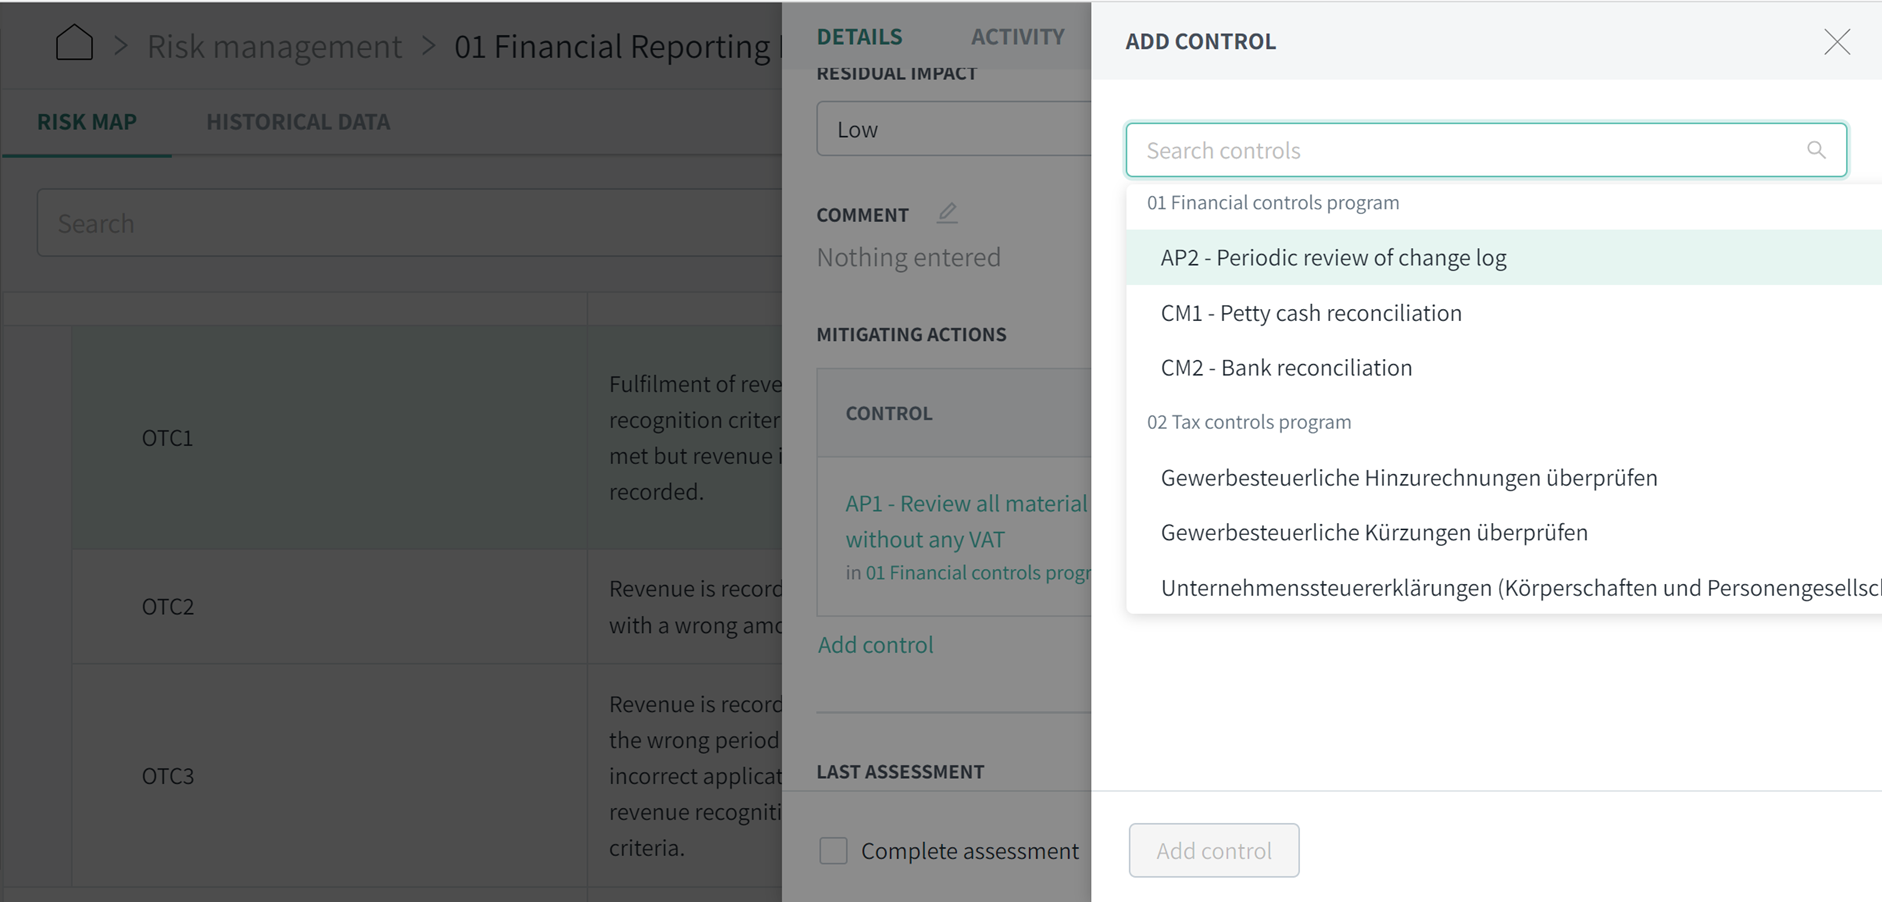
Link risks with mitigating controls
- Add the mitigating control by clicking on "Add control", then "Search controls" and selecting the control in the dropdown list. You can also enter the name of the control to find it.
- Optionally, indicate the percentage of risk coverage through the mitigating control(s) by moving the slide bar.
- Finish by clicking on "Add control".
Tip: You can add multiple mitigating controls to one risk.
Preparation Guide: What needs to be decided in advance
Customization of risk map
Fit the risk assessment schema with your company-specific approach.
Apply your individual risk assessment criteria in the blue marked area. Both assessment criteria (e.g., inherent impact) and values (e.g., very low to very high) can be adjusted.
You can also add further elements such as single/multiple choice tasks and comments.
➤ Find the design options here.
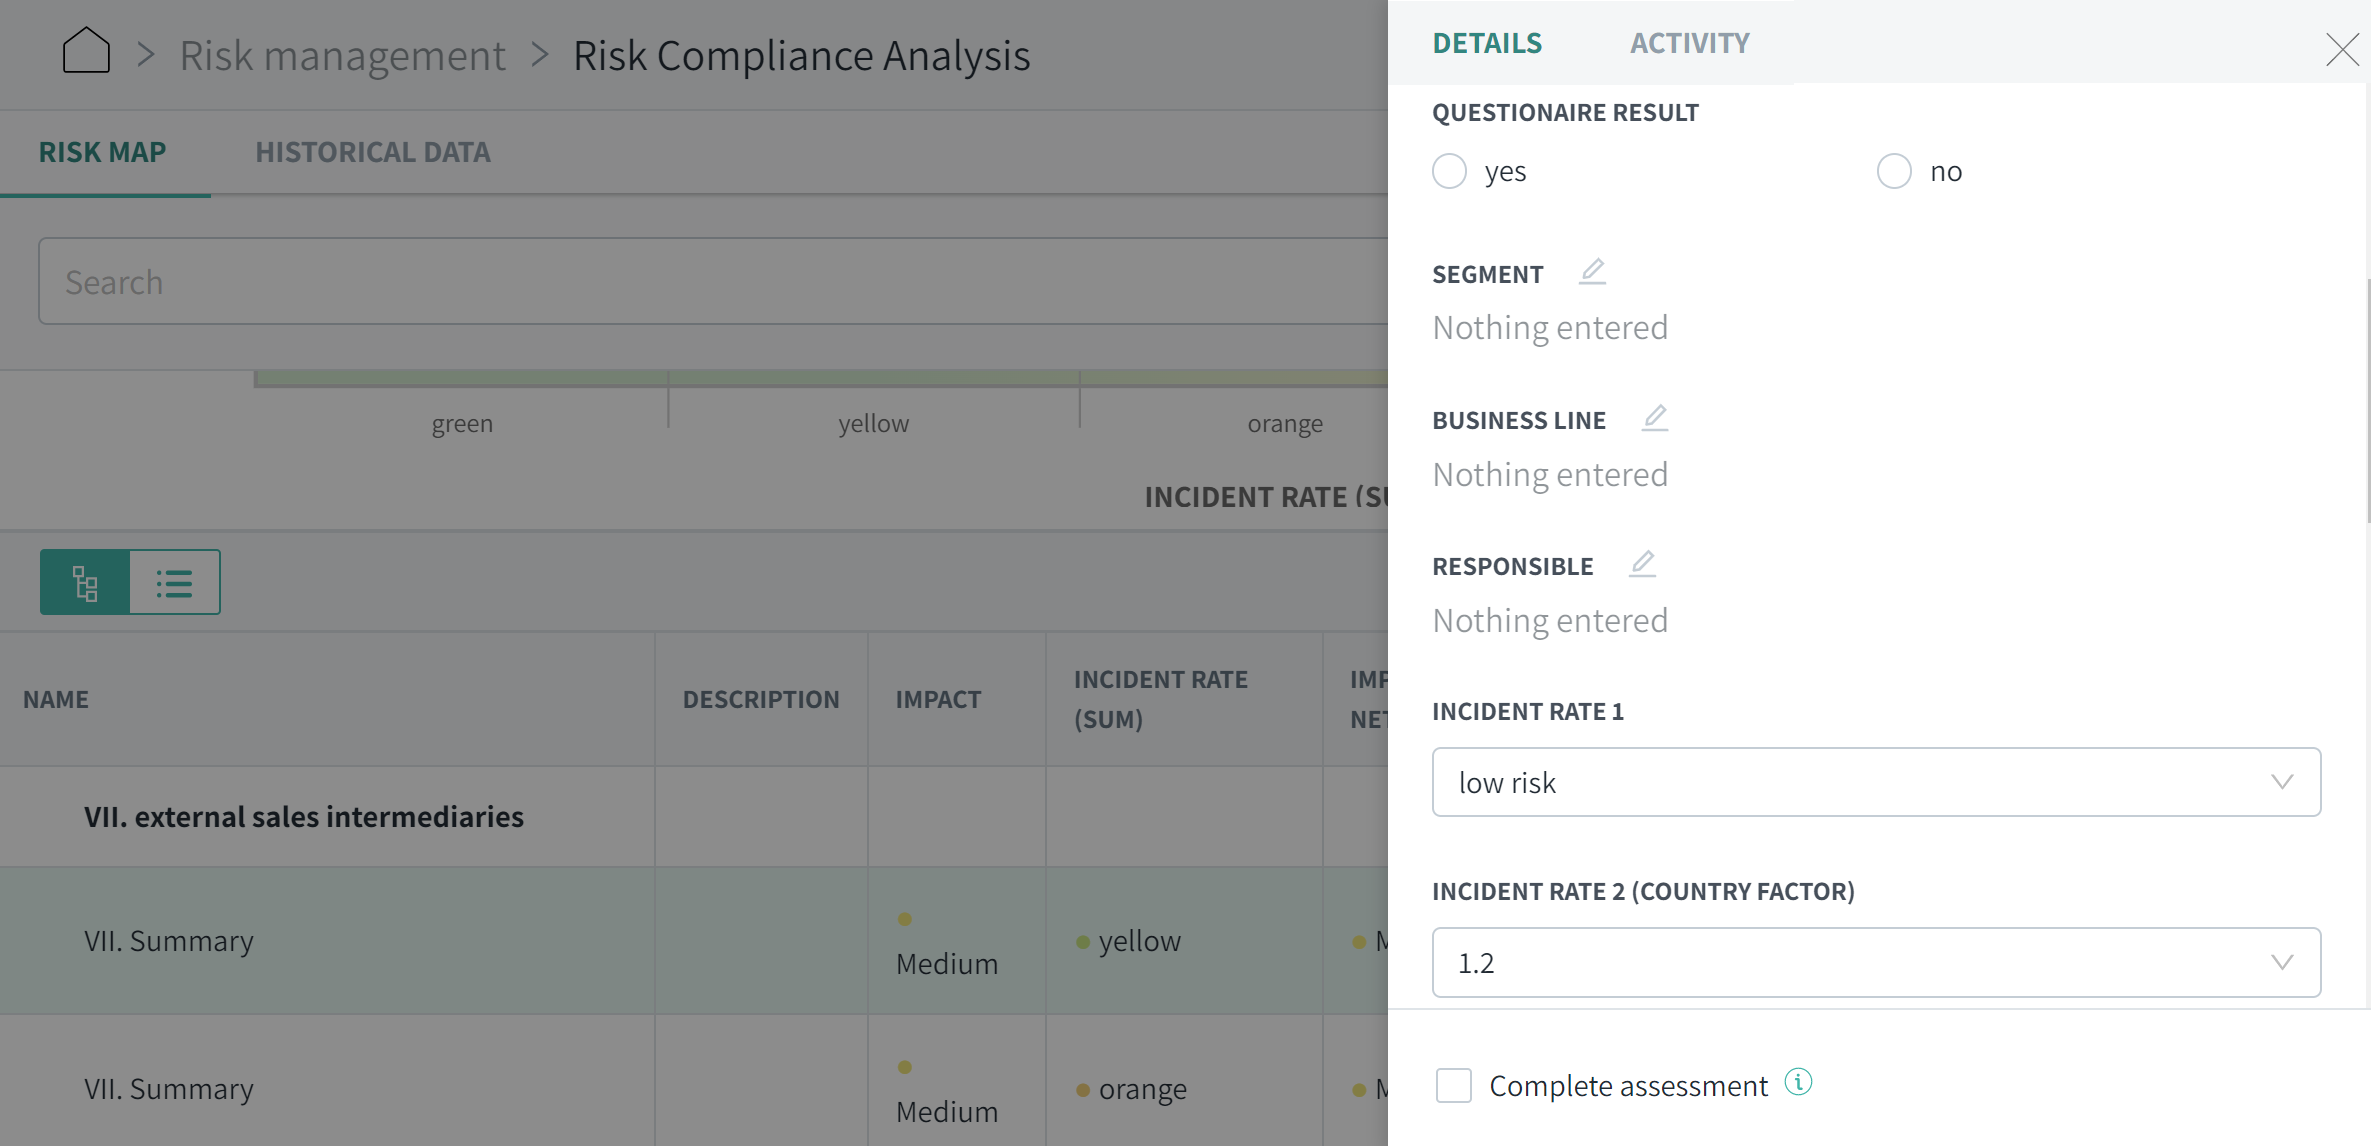
Need an example of an adjusted risk map?
Note: Contact your Customer Success Manager to customize your risk directory.
In addition: You want to integrate a calculation based on the assessed levels of risk assessments? Please contact us to discuss further details.
Learn more:
You want to set up local risks (entity-/region-specific)?