
Overview
Impero supports SCIM-based user provisioning via Microsoft Entra ID (Azure AD). This allows your organization to automatically:
- Create users in Impero
- Update user details
- Mark users for deprovisioning when they are removed from scope
Provisioning scope is defined in Azure AD. Impero acts on the lifecycle instructions received from your identity provider.
Note: Users are not automatically deleted. When removed from Azure scope, users will be marked as deprovisioned and must be manually reviewed before removal.
Setting up SCIM Provisioning in Azure AD
Prerequisites
Before configuring SCIM provisioning, ensure that:
- Contact Customer Support to make sure SCIM provisioning is enabled for your Impero organization
- You can create Enterprise Applications in Azure
- You can generate API keys in Impero
Step 1: Create a System User in Impero (Recommended)
Provisioning works through Impero’s Public API. It is recommended to use a dedicated system user for this integration.
- Go to User Management
- Create a new user (e.g., “SCIM System User”)
- Assign the user one of the following roles:
- Administrator
- User Administrator
- Ensure the user also has the API User role
Using a system account prevents disruptions if a personal admin account is removed.
Step 2: Generate an API Key
- Log in as the system user
- Go to Profile
- Click Create API Key
- Select scope: Users
- Name the key (e.g., “SCIM Provisioning”)
- Copy and securely store the API key
You will need this key when configuring Azure.
Step 3: Create an Enterprise Application in Azure
- Log in to the Azure portal
- Go to Enterprise Applications
- Click New Application
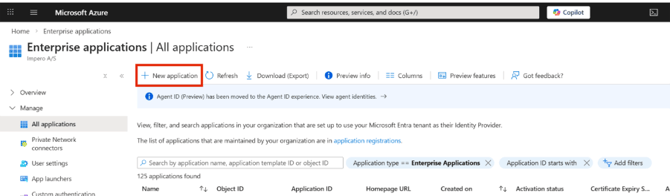
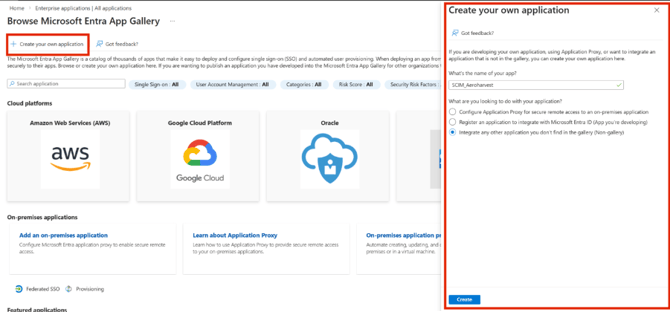
- Select Create your own application
- Choose:
Integrate any other application you don’t find in the gallery - Enter a name (e.g., “Impero SCIM”)
- Click Create
Step 4: Configure Provisioning in Azure
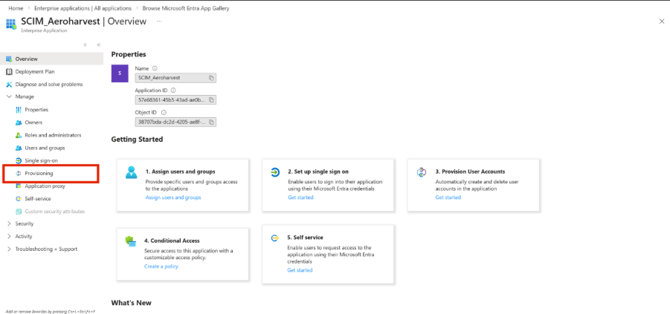
- Open your newly created Enterprise Application
- Select Provisioning
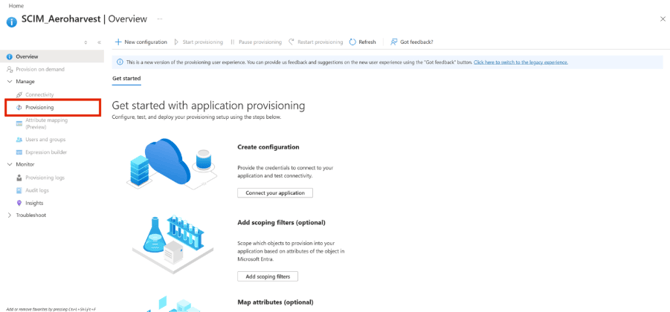
- Select Provisioning again
- Click on New configuration
Configure the following:
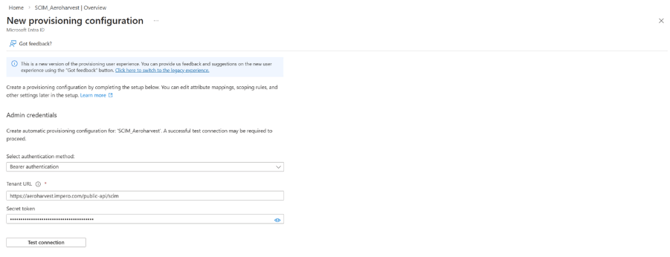
Authentication Method
- Select Bearer Token
Tenant URL
-
Enter https://your-impero-domain/public-api/scim
(Replace your-impero-domain with your organization’s Impero URL.)
Secret Token
-
Paste the API key generated earlier
-
Click Test Connection to verify
- If successful, save the configuration
Step 5: Define Provisioning in Azure
- Go to Users and groups.
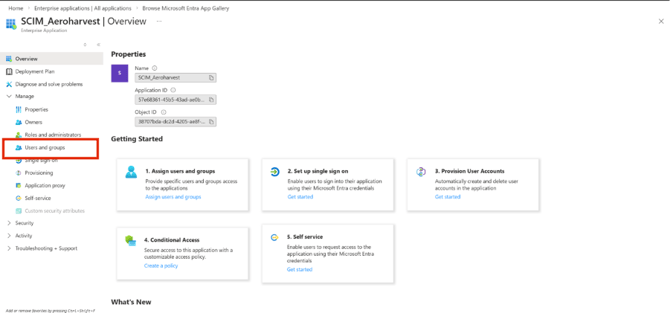
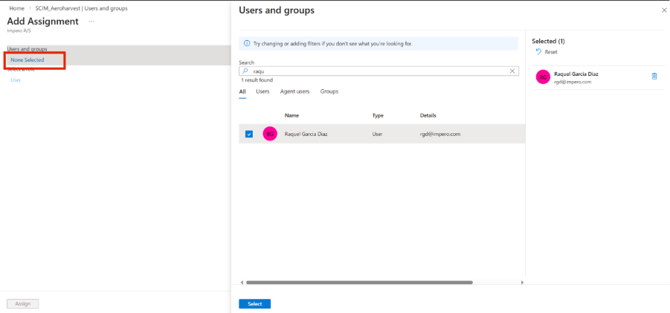
- Click “None selected” in Add user/group.
- Select users (or assign a group).
- Click Assign.
Assigned users will be provisioned to Impero during the next sync cycle. Azure runs provisioning cycles approximately every 40 minutes by default, but this may vary based on Azure configuration.
Step 6: Start provisioning
Click on Start Provisioning
When provisioning is enabled:
- Users assigned to the SCIM application → Created/Updated in Impero
- Users removed from the SCIM application→ Status changed to "Deprovisioned” in Impero
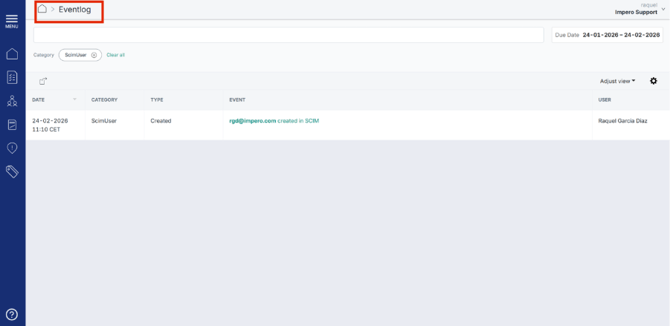
Event Logging
When provisioning or deprovisioning occurs:
- An entry is recorded in the Impero event log.
- A SCIM user mapping record is created internally.
- Updates (e.g., name changes in Azure) will also sync during the next provisioning cycle.
Understanding User Status in Impero
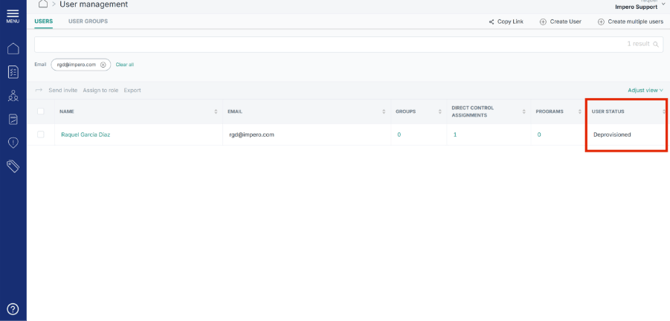
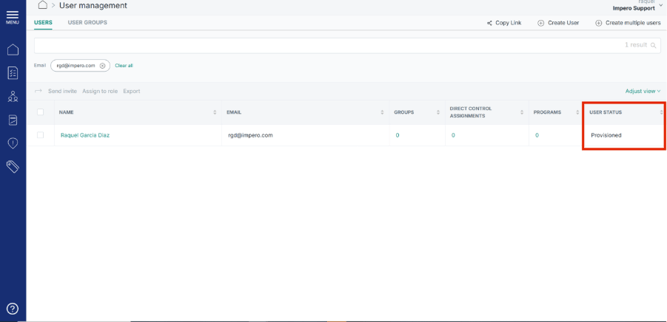
A new column called User Status is available in User Management.
It may show:
|
Status |
Meaning |
|
Provisioned |
User is managed via SCIM (included in Azure scope) |
|
Deprovisioned |
User has been removed from Azure scope |
|
(Blank) |
User is not managed via SCIM eg. Users created manually in Impero |
Important Behaviour Notes
Users Are Not Automatically Deleted
When a user is removed from the SCIM application:
- The User Status value is updated to “Deprovisioned”
- They are not automatically removed
- Manual cleanup is required
If a user has:
- Assigned activities
- Reviewer responsibilities
- Program ownership
These must be resolved before deletion.
Existing Customers: What to Expect
If you enable provisioning for an existing organization:
- Users included in the SCIM application will be marked as Provisioned
- Users created manually in Impero, and is not assigned to the SCIM appilcation will have a blank User Status
- Deprovisioning only occurs when Azure actively removes a user from scope
A manual cleanup phase may be required to fully align users.